Thursday, August 26, 2010

Quilt Retreat

My birthday present this year is going to a new quilting retreat in Tryon, which is in western North Carolina, where the wild and wonderful Marilyn Doheny, quilt designer extraordinaire, is the new owner of the old Melrose Inn, freshly refurbished in her inimitable way.  Here she will teach her inspired techniques using the 9 degree ruler in a week long class called Instant Garden --  Just Add Fabric!  She promises that our flowers and critters will be completed by the end of the retreat and ready to applique onto our background quilt!  I hope so.  I am not known for getting my quilts finished in a timely manner....


Experimenting with colors in bright strata, Marilyn has brought a fresh and exciting perspective to the quilting industry, and has been instrumental in developing the tools, such as the 9 degree ruler, to do this.  That's Marilyn, there, on the right.   She's just a wisp of a thing, but she has the energy of the Eveready Bunny! 

So, she has given us a list of supplies, including about 17 different fabrics, more or less.  We are to start with a baseline quilt, already made up and consisting of a fabric of our choice as the center and three borders around it.  Here are my choices for the borders.  The central fabric for the body of the quilt hasn't arrived yet. (Don't forget, I live in Outer Slobovia or its equivalent down here in deepest darkest southern Virginia, and we don't have fabric shops within reach.  We have to travel hours in any direction to get to one, so I ordered mine online.)


The widest, outer border will be the black fabric with bright flowers on it.  Then there will be a narrow turquoise blue one and then a medium sized, checked one for the innermost border.  I'm thinking of using a muted peach for the center, but we'll see.

On this background quilt, we will place our "garden flowers and critters" that we create from our strata.  Some of my selections for the colors for my strata are below.


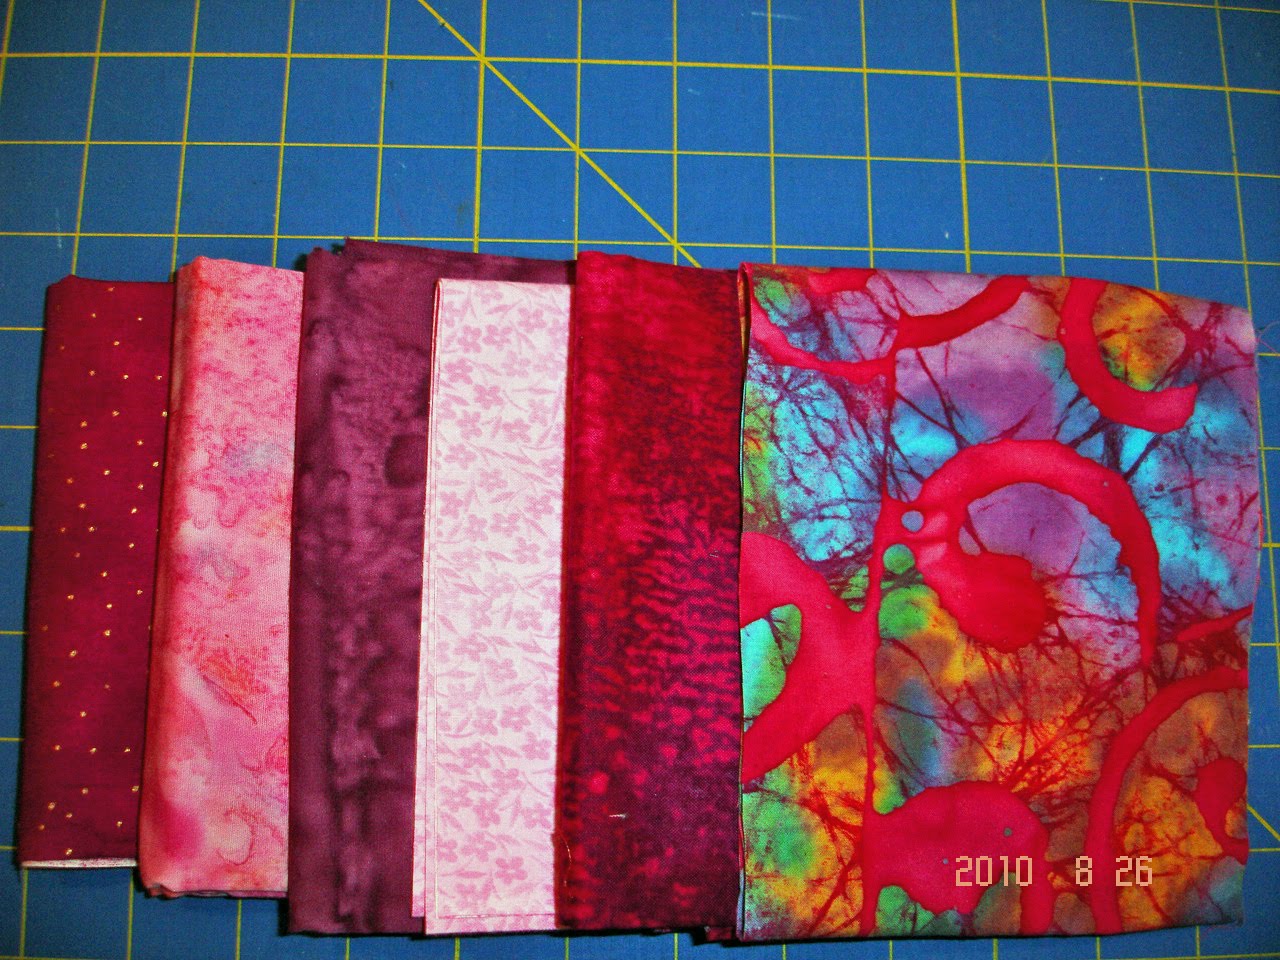
I guess you can see that I haven't really settled on any particular palette yet.  But the whole idea is to mix and match, choosing the colors for each strata not so much to match the others as to balance them -- light and dark, opposites on the color wheel, striking saturation vs pale.    And then we're also supposed to choose at least three "zingers" that are bold enough to "pop" the design in small quantities.  Here are mine:


Lastly, we're supposed to experiment a little with plaids or stripes.  Here are a few that I'm auditioning for my strata:


What to choose...what to choose!  Maybe all of them.  Won't that be a wild garden!  Tomorrow I need to bite the bullet and start creating some strata to take with me to the class.

Wednesday, August 25, 2010

Mystery


I love mystery quilts.  I sign up for them wherever they are offered -- Quilt Odyssey, quilt guild, wherever!

About 7 days ago I received this and another quilt top in the mail.  There was a return address on the box, but no letter of explanation.  I didn't think I was expecting a customer to mail me a quilt, so I guessed that they might be Quilts of Valor, sent to me to finish.  But I couldn't prove it.


So I quilted the first one, and it became the second quilt I had done with my new motors to my Intelliquilter.  It went quite well, but I still had the mystery of who this person was who had sent them and for what purpose were they being quilted by me?  A web search of her name and address yielded only the information that her telephone number was unlisted.  So I wrote a letter to her, asking the particulars.  This is the first letter I have written in about 20 years! (Not counting Christmas missives and occasion cards.)

To cover myself, I also emailed the QOV people.  On the same day, I received the QOV confirmation that these were, indeed, QOV quilts and the name of the "partner", and I also received an email from the sender with, I confess shamefacedly, a copy of my email to her in July stating that I couldn't do her quilts until mid-August.  She had dutifully waited until then to send them, but forgot to notify me that they were in the mail.  And, of course, I didn't remember a thing.  This CRS thing is creeping up on me by degrees, and it appears to be winning!

Mystery solved! 

The quilt below is one I made of "inherited" blocks from an elderly lady who was entering a nursing home and needed to clear out her sewing room.   I added the floral fabric and then quilted it as the first one done with my new IQ motors. 


It's small, but it's lined with flannel. I think I will give it to the shelter for abused women with their kids -- they don't have alot that's really nice there, and I hope someone will snuggle up in it and feel comforted in their sad lives.

Tuesday, August 24, 2010

New giveaway!

I just visited a blog called Quilt Story.  The newest entry there is I Spy A Ladybug Giveaway.   The Ladybug Quilt Shop is giving away 8 fat quarters of the most luscious fabric!  Visit it and see what they have.

Thursday, August 12, 2010

StIQy WIQet


Bummer!  My Y axis motor on the IQ broke/got stuck this past Saturday, and I needed to replace it.  I was on the list for the new, more powerful motors, but they don't have all the bugs ironed out yet, so I thought I was going to get a replacement older model and have to replace just one motor.


That was not to be.  Zoltan Kasa, the remarkable inventor of this robotics program, sent me two of the new motors on Tuesday.  And since they needed new mountings, he sent those as well.  With great fear and trepidation I gathered together my tools:  Allen wrench set, Phillips screwdriver, metal measuring tape, wire snips, wide ruler, etc.
Zoltan sent me the first set of motors, but the Y motor had a bent axle on its sensor wheel, so he needed to Fed Ex me another one, which arrived on Wednesday afternoon.  Meanwhile, I took a trial run installing the X motor.


I was able to put on the mountings, level them, add the motor, change the wheel base to allow the motor to clear the railing, make sure the motor was exactly parallel to the railings and screw everything down, ascertain that the drive wheel was just a hair's breadth above the railing in the resting position, and put the right plug into the right pins -- on the X axis motor.  I practiced on this one, since all parts are easily visible, unlike the Y motor.  But even so, it took me two hours!

Here's a picture of that tiny space between the drive wheel (black) and the railing.

Not so lucky with the Y motor.  It turns out that the intermediary mounting (just above that sexy looking rubber belted thingy) is 1/4" too short, so the motor won't clear the Y rails.  Back to the drawing board.  Zoltan says he will Fed Ex me a new plate tomorrow.  I'm getting used to this stuff, now.  But he sure is
spending alot of money with the Fed Ex people!!


Lest you think I am an ungrateful wretch, despite these setbacks, I need to tell you that nowhere else in the computerized robotics industry do you get such incredible, instant and specific help.  Zoltan couldn't apologize more for not being able to be here to do this work for me himself.  Both he and my substitute IQ dealer are traveling separately somewhere in the US and neither can fly back here instantly.  I don't really mind that it's all up to me.  However, DH's nose is out of joint, especially when I explained to him that I didn't want him to do the work, I just wanted to borrow one of his tools (the wire snipper).  I have accepted the challenge of doing my own machine maintenance!

Sooooooo, I get to sit on my hands again tomorrow while I wait yet another time for another part to my IQ.  But today the 5D Extra embroidery program for my HV Designer Diamond came in, and I ran down to Rocky Mount (about 1  1/2 hours away) to pick it up.  I'll install that onto my business laptop that I also use for the Diamond, and fiddle around with that until the mounting plate arrives.  This promises to be equally fun compared to putting on the new motors for the IQ, because I am equally "challenged" when it comes to computers and understanding how to fix it if something goes wrong.


Monday, August 9, 2010

Accessories


You know how you have these fancy shmancy sewing/embroidery machines and all their software and all the feet -- even before you take the first class!  Well, I went a little overboard after I bought my first Husqvarna Viking Designer 1 back in 2002, I think.  I loved it.  Bought the 3D software.  Used it all as much as I could understand, which wasn't half bad. 

Then came an opportunity to buy another one at half price on ebay.  Brand new.  Never opened.  Not a reconditioned one.  With something like 20 feet included beyond what normally comes with the machine, and all the other bells and whistles.  So of course, I bought it.

I put one in my studio when we moved here, and one in my project room.  While the longarm is quilting away, I can put on binding or work on piecing another quilt.  And when friend, Mary, comes to visit, she doesn't have to bring her upscale Bernina -- or even her Singer featherweight. 

But what to do with all those feet?  For a few years they lived in one of the drawers in my sewing center and never saw the light of day.  Then I found some demos of their use on the HV site and elsewhere and started thinking -- isn't it time to get these things out and at least see what I've got?


Once I discovered that I have every foot ever made for the Designer series, I then had to think about how to store them in a place that was not only accessible but also portable.  I was scrounging around my project room, thinking I might make an accessory roll or some such thing when voila!  I found THREE of these accessory/thread/foot bags!!!  Basic black -- boring, but profesional looking.  Tan print -- understated but not really me any more.  Ahhhhh!  Dusty rose floral.  Now that's the ticket!  Feminine with a hint of scarlet...

I explored the outer pockets and put the large accessory feet in the very large outer zipped pocket.  There was an open pocket on the back with just a small velcro closing.  I left that free for patterns and the like.


Inside were pages, like in a notebook, velcroed into the spine of the bag.  Some pages had large zippered compartments and some had small ones.


I could leave the more complicated feet in their cards intact by storing them in the larger compartments.  And in the smaller ones, I could remove the foot from its card, trim the card so that just the number of the foot on the front and a pictured explanation of how it functions on the back of the card remained, and it would all still fit in one of the smaller compartments.


So now my machines' feet are totally organized!  Maybe you have a similar situation. You can find these bags at local quilt shops or online (usually under "organizers") or at any quilt exposition.  Enjoy!

Thursday, August 5, 2010

Creation


It's finished!!!  My guild friend, Lois' beautiful Creation quilt is finished!  I must say that this quilt took me an extraordinarily long time to do.  I had to create six of the designs from scratch:  Earth, Jupiter, Saturn, central star bursts, Alpha and Omega.  These were then outlined in gold metallic thread and placed between the pieced stars, all except the Alpha, Omega and Earth.  Those were three of the four corners surrounding the central red and yellow fireball.  The fourth corner there was a Celtic symbol for the Trinity. 


One of my favorite additions was this moon figure, which I cut from a larger moon and stars block.  Other cut designs from that block included comets and shooting stars.


So now I'm taking the rest of the day off, having already cleaned the house this morning while waiting for my customer to come to pick up her quilt.  But first, I'll show you what darling hubby did for me this past weekend.


I have to get the poles trimmed, but if they turn out to be the right distance from the wall for me to use the outer portions as hanging rods for my quilts-in-waiting, I may just keep the tallest one that long.  I have more batting to hang after the poles are trimmed, and the lowest bracket is repositioned.  As it is, it interferes with my ironing board.

Now, you might ask why we put the racks in that location, across the five foot door.  Well, that door goes into the part of the basement that holds the heat pumps, and we have access to them through a different door.  This one was created just so I could actually move my Nolting frame out of this room if I ever had to, so it's ok to cover it up for now.


This little darling has been waiting three years to get her own home, and we finally found a spot in my studio that is just right!


And now Miss Lissa (my Nolting 24 Pro) and her IQ (tablet on her head) are just waiting for me to load the next quilt on the frame.  But first, some iced tea and a few moments to read a real book.  I have been enjoying my Nook, but really, nothing is like a real book.  The texture, the smell, the luscious decadence of curling up on the sofa for a few hours.  Nope.  Nothing beats a real book.